


Fellow Sim Racers, the TR160 is coming together nicely. It’s been a slow process. Working from home with two little ones during the day, leaves me with a few hours before bed, to assemble. After a few weeks, here’s what I’ve learned.
#1 Get a tape measurer
#2 A level is very handy
#3 Blue 3M painters tape is really nice to help line up profile to get the measurements just right. Tape off the ends of the profile during assembly so you don’t rake your leg across the sharp edge. I did this once. Very painful/big band-aid.
#4 A quality set of Ball End Allen Wrenches comes in handy, and makes the process much easier
#5 Order some extra M8x16 & 20 bolts. About 20 for each. You’ll thank me later. Tnutz.com is great place to get them at, and they’re reasonably priced and ship quickly.
I followed the directions till I was at step 6, with the seat, then I kind of off tracked my own direction. I’ve assembled the new rig, parallel to my old RSeat RS1. Mostly so I could have a better measurement of seat position compared to where the wheel deck lines up for comfort and functionality.
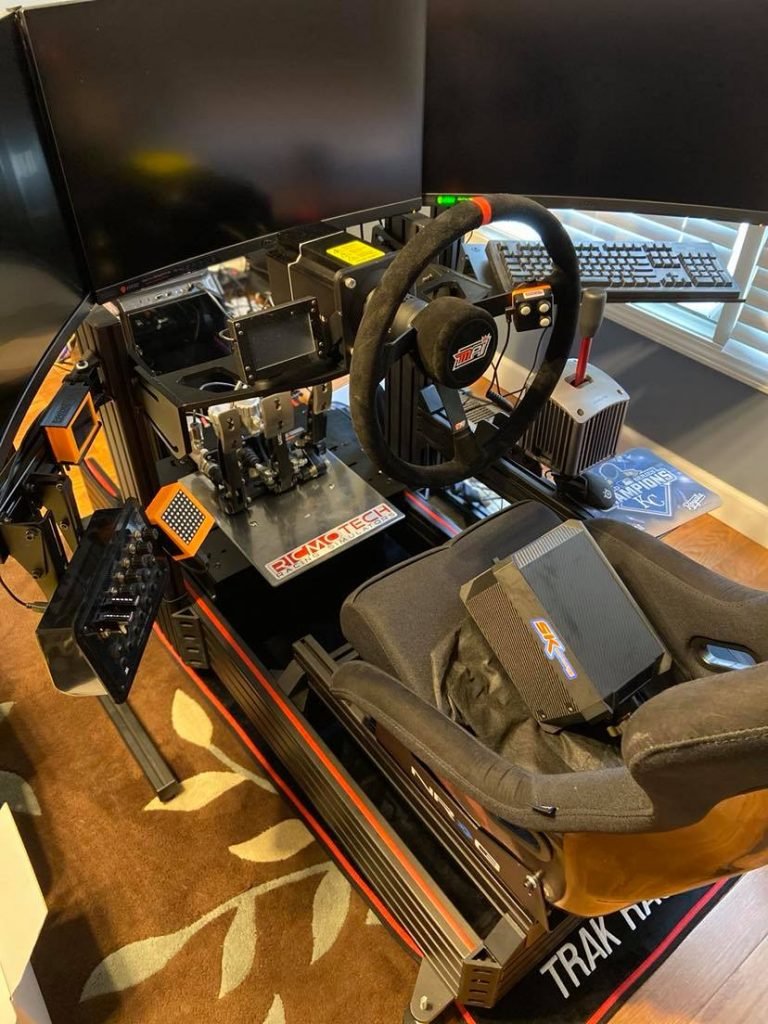
I’m using a wheel deck from a Sim-Lab P1-X. Why? You may ask. Well, it’s a solid once piece unit that has angle adjustability built into it. Main reason though is so I can swap my DD2 and SC2 Pro back and forth with ease. 3-4 bolts from the bottom and they’re off, and I can place the other base right on.
At this point in the build process I can unbiasedly say, the TR160 is built like a rock. It’s solid. No flex. Which is what you want in a 80/20 profile rig.
Next step is to finish up the peripheral device attachments such as, keyboard tray (swivel version), mouse pad, button box holder, and shifter mount. Then comes the daunting task of disassembly of the RS1 and removing it from the office, so we can slide the TR160 over to its final place.
Update 2:
I have the rig assembled now to where I’m able to use it. I’ve been working on cable management and peripheral device placement. Minor setback. The Sim-Lab wheel-deck is unfortunately not drilled for an SC2 mount. I realize I could have it drilled, however I felt the best option would be to go with a 580 mm profile and mount it that way. I ordered the https://www.trakracer.com/product/full-slide-and-angle-adjustment/?ref=10 This way I’ll still be able to swap the DD2 and SC2 Pro back and forth with relative ease.
Once the new wheel deck arrives, I’ll give an update on installation and how it’s adjustability comes into play. I’ll also be replacing the standard keyboard tray with the new swivel keyboard tray, when it arrives with the profile wheel deck.
After a weeks use of the new TR160. One word still comes to mine “solid”. It does not move. I’ve had both the DD2 and SC2 Pro on the current wheel deck, and had the torque set up as high 16 newton meters. After scrubbing across the turtles at the Charlotte Roval in the Australian SuperCars, I can attest it does not rattle, shake or vibrate. Same can be said for hitting the tire barrier (intentionally) in turn 1 (Heartburn turn). Really solid build so far. The guys at TR should be proud.
If you’d like to order your own TR160 or any Trak Racer product for that matter, head over to https://www.trakracer.com/?ref=10 affiliate link, and enter code sksimracing to save yourself 5% off the purchase of any order.